# Migrating to Vespa Cloud
Migrating a Vespa application to Vespa Cloud is straightforward, as applications on Vespa Cloud supports all the same features as your self-hosted Vespa instances, you're just gaining some new capabilities and avoid the operational work.
The high-level process is as follows:
1. Functional validation using the [dev](../operations/environments.html#dev) environment (this guide).
2. Deployment to a [prod](../operations/environments.html#prod) zone.
The rest of this guide assumes you have a [tenant](tenant-apps-instances.html) ready for deployment:
```
$ export VESPA_TENANT_NAME=mytenant
```
**Prerequisites:**
- Linux, macOS or Windows 10 Pro on x86\_64 or arm64, with Podman or [Docker](https://docs.docker.com/engine/install/) installed. See [Docker Containers](/en/operations/self-managed/docker-containers.html) for system limits and other settings. For CPUs older than Haswell (2013), see [CPU Support](/en/cpu-support.html)
- Memory: Minimum RAM dedicated to Docker/Podman. [Memory recommendations](/en/operations/self-managed/node-setup.html#memory-settings).
- Disk: Avoid `NO_SPACE` - the vespaengine/vespa container image + headroom for data requires disk space. [Read more](/en/writing/feed-block.html).
- [Homebrew](https://brew.sh/) to install the [Vespa CLI](/en/clients/vespa-cli.html), or download the Vespa CLI from [Github releases](https://github.com/vespa-engine/vespa/releases).
**Note:**[Vespa Cloud Enclave](../operations/enclave/enclave.html) users: Run the Enclave setup steps first.
### 1. Verify source application package
An [application package](../basics/applications.html) from a self-hosted system can be deployed with minor modifications to the Vespa Cloud `dev` environment.
The root of an application package might look at this:
```
├── schemas
│ └── doc.sd
└── services.xml
```
There are often more files, the above is a minimum. This is the root of the application package - make this the current working directory:
```
$ cd /location/of/app/package
```
### 2. Validate the Vespa CLI
Make sure the Vespa CLI is installed, see pre-requisites above:
```
$ vespa
Usage:
vespa [flags]
vespa [command]
```
### 3. Vespa Cloud login
Configure the local environment and log in to Vespa Cloud:
```
$ vespa config set target cloud && \
vespa config set application $VESPA_TENANT_NAME.myapp && \
vespa auth login
```
### 4. Add Credentials to the Application package
Create and get security credentials:
```
$ vespa auth cert
```
This will add the `security` directory to the application package, and add a public certificate to it:
```
├── schemas
│ └── doc.sd
├── security
│ └── clients.pem
└── services.xml
```
The command also installs a key/certificate pair in the Vespa CLI home directory, see[vespa auth cert](../reference/vespa-cli/vespa_auth_cert.html). This pair is used in subsequent accesses to the data plane for document and query operations.
### 5. Vespa Cloud Enclave Only: Add Account
**Note:** Skip this step unless you are using [Vespa Cloud Enclave](../operations/enclave/enclave.html).
Add [deployment.xml](../reference/deployment.html#deployment) with your cloud provider account - This ensures the deployment uses resources from the correct account - examples:
```
```
```
```
The application package should look like:
```
├── deployment.xml
├── schemas
│ └── doc.sd
├── security
│ └── clients.pem
└── services.xml
```
### 6. Remove hosts.xml
`hosts.xml` is not used in Vespa Cloud, remove it.
### 7. Modify services.xml
Edit the `` configuration in `services.xml` - from:
```
```
to:
```
```
In short, this is the Vespa Cloud syntax for resource specifications.
Example, migrating from a cluster using `c7i.2xlarge` instance type, with a 200G disk - from the AWS specifications:
```
c7i.2xlarge 8 16 EBS-Only
```
Equivalent Vespa Cloud configuration:
```
```
Repeat this for all clusters in `services.xml`. Notes:
1. As you are now migrating to the `dev` environment, what is _actually_ deployed is a minimized version. The configuration changes above are easily tested in this environment.
2. Using `count=2` is best practise at this point.
3. Resources must match a node instance type at the cloud providers(s) deploying to, see[AWS flavors](https://cloud.vespa.ai/en/reference/aws-flavors.html),[GCP flavors](https://cloud.vespa.ai/en/reference/gcp-flavors.html), and [Azure flavors](https://cloud.vespa.ai/en/reference/azure-flavors.html).
### 8. Deploy to Vespa Cloud Dev Environment
At this point, the local environment and the application package is ready for deployment:
```
$ vespa deploy --wait 600
```
Please note that a first-time deployment normally takes a few minutes, as resources are provisioned.
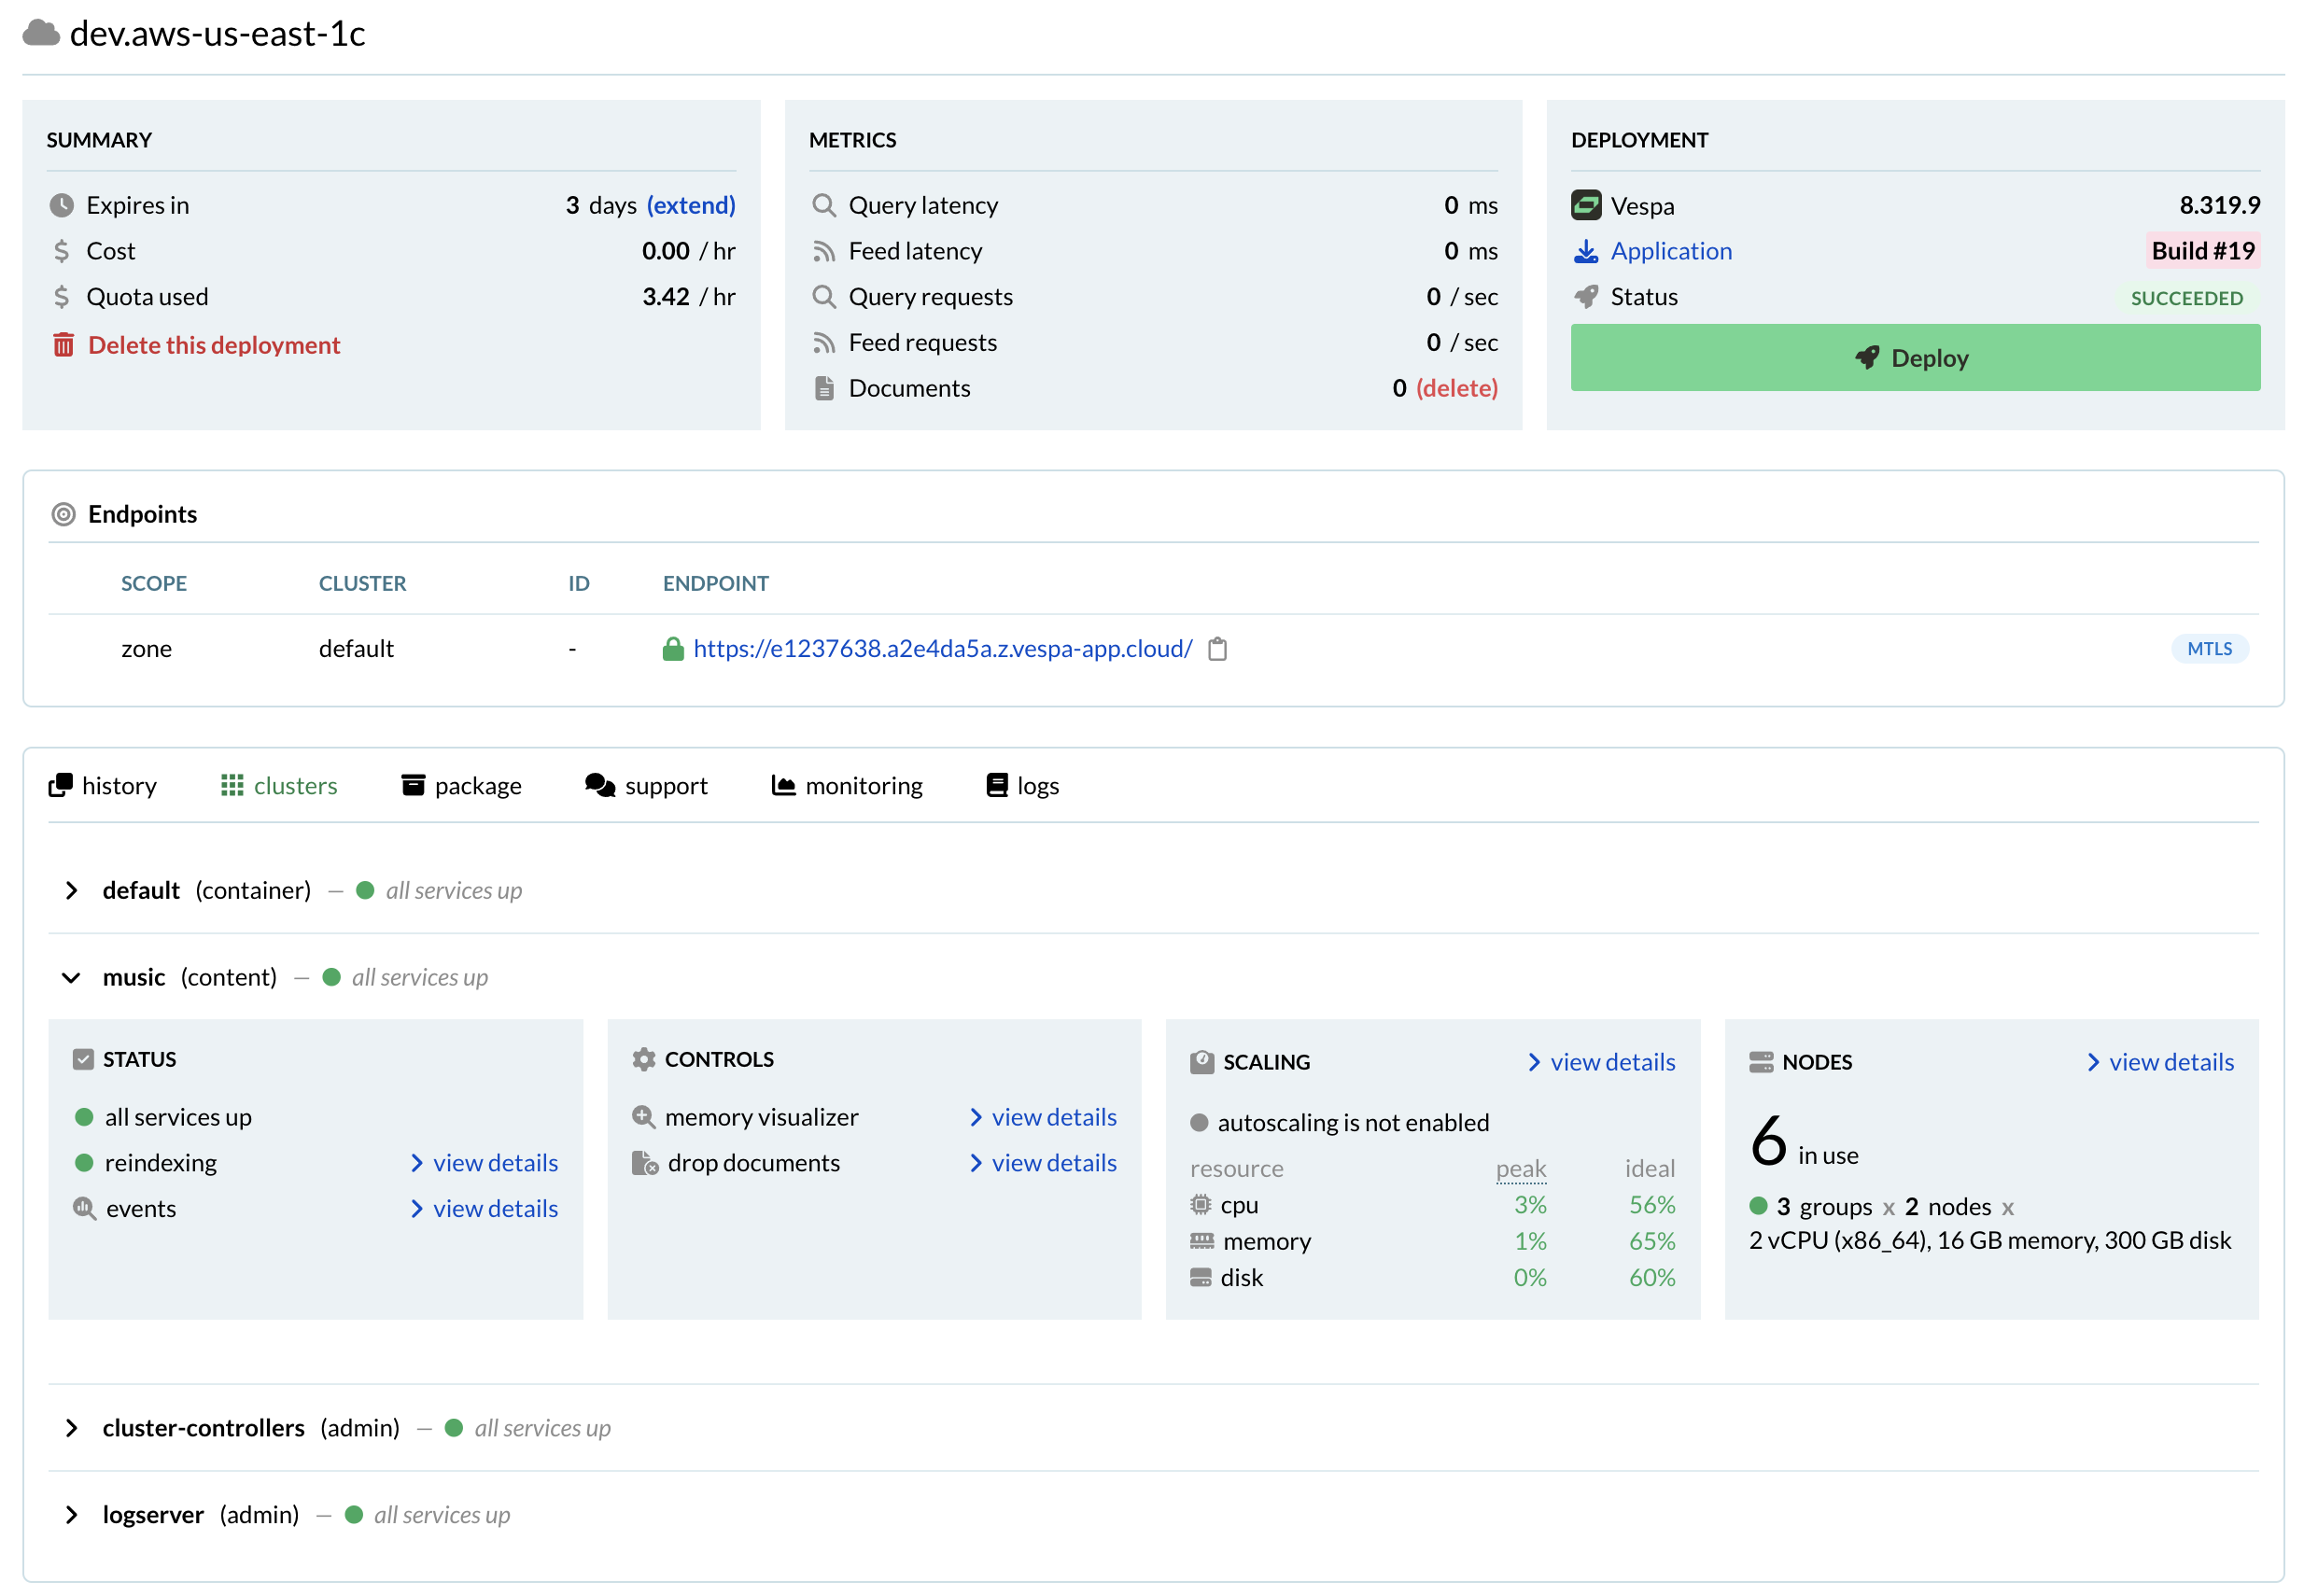
At this point, we recommend opening the console to observe the deployed application. The link will be `https://console.vespa-cloud.com/tenant/mytenant/application/myapp/dev/instance/default`(replace with your own names) - this is also easily found in the console main page:
Refer to [vespa8 release notes](../reference/release-notes/vespa8.html) for troubleshooting in case the deployments fails, based on a Vespa 7 (or earlier) version.
### 9. Use the Endpoints
The endpoints are shown in the console, one can also list them like:
```
$ vespa status query
Container default at https://aa1c1234.b225678e.z.vespa-app.cloud/ is ready
```
Test the query endpoint, expect `totalCount: 0`:
```
$ vespa query 'select * from sources * where true'
```
```
{
"root": {
"id": "toplevel",
"relevance": 1.0,
"fields": {
"totalCount": 0
},
```
In the `services.xml` examples at the start of this guide, both `` and `` and configured in the same cluster, named `default`. In case of multiple container clusters, select the one configured with ``:
```
vespa query 'select * from sources * where true' --cluster myquerycluster
```
Finally, feed a document to the cluster (this is the cluster configured with ``)
```
vespa feed mydoc.jsonl --cluster myfeedcluster
```
Redo the query and observe nonzero `totalCount`.
## Next steps
This is the final step in the functional validation. Please note:
**Note:** Deployments to `dev` expire after 7 days of inactivity, i.e., 7 days after the last deployment.**This applies to all plans**. Use the Vespa Console to extend the expiry period, or redeploy the application to add 7 more days.
- Read more about the [dev](../operations/environments.html#dev) environment
- Feed (a subset) of the data and validate that queries and other API accesses work as expected.
- At the end of the validation process, continue to [production deployment](../operations/production-deployment.html) to set up in production zones.
Copyright © 2025 - [Cookie Preferences](#)
### On this page:
- [1. Verify source application package](#1-verify-source-application-package)
- [2. Validate the Vespa CLI](#2-validate-the-vespa-cli)
- [3. Vespa Cloud login](#3-vespa-cloud-login)
- [4. Add Credentials to the Application package](#4-add-credentials-to-the-application-package)
- [5. Vespa Cloud Enclave Only: Add Account](#5-vespa-cloud-enclave-only-add-account)
- [6. Remove hosts.xml](#6-remove-hostsxml)
- [7. Modify services.xml](#7-modify-servicesxml)
- [8. Deploy to Vespa Cloud Dev Environment](#8-deploy-to-vespa-cloud-dev-environment)
- [9. Use the Endpoints](#9-use-the-endpoints)
- [Next steps](#next-steps)