-
Applications and components
- Developer guide
- IDE support
- Deployment
- .vespaignore files
- Containers
- Components
- Searchers
- Document processors
- Request handlers
- Result renderers
- Dependency injection
- Configuring components
- Chaining
- Inspecting structured data in a Searcher
- Developing web services
- Unit testing
- System testing
- The config system
- Request-response processing
- Bundles
- Using ZooKeeper
- Http servers and filters
- Using pluggable frameworks
- Java config API
-
Querying
- The query api
- The YQL query language
- Grouping and aggregation
- Federation
- Query profiles
- An intro to vector search
- Nearest neighbor search
- Approximate nearest neighbor search
- Nearest neighbor search guide
- Text matching
- Searching multivalue fields
- Geo search
- Document summaries
- Result diversity
- Page templates
-
Ranking and inference
- Ranking introduction
- Ranking expressions and features
- Multivalue query operators
- Tensor user guide
- Tensor examples
- Phased ranking
- Using TensorFlow models
- Using ONNX models
- Using XGBoost models
- Using LightGBM models
- Wand: Accelerated OR search
- The BM25 rank feature
- The nativeRank rank feature
- Cross-encoder transformer ranking
- Searcher re-ranking
- Significance model
- Stateless model evaluation
-
Linguistics and text processing
-
Content and elasticity
-
Performance
- Performance overview
- Practical performance guide
- Serving sizing guide
- Feed sizing guide
- Node resources
-
Instance types
- Topology and resizing
- Streaming search
- Benchmarking
- Benchmarking using Vespa Cloud
- Memory visualizer
- Profiling
- Container tuning
- Rate-limiting queries
- Graceful degradation
- Caches
- HTTP performance testing
- HTTP/2
- Feature tuning
- Valgrind
-
Operations
- Quota
- Environments
- Zones
- Availability Zones
- Production deployment
- Deployment variants
- Automated deployments
- Autoscaling
-
Enclave: Bring your own cloud
- Reindexing
- Reindexing on Vespa Cloud
- Data management and backup
- Cloning applications and data
- Monitoring
- Metrics
- Telemetry export
- Notifications
- Support
- Login Help
- Single Sign-On (SSO) Setup
- Deployment patterns
- Private endpoints
- Endpoint routing
- Access logging
-
Artifact archive
- Deleting applications
-
Self-managed
- Admin procedures
- Multinode Systems
- Files, Processes, Ports, Environment
- Node Setup
- Using Kubernetes
- Build and install
- Monitoring
- Content node recovery
- Configuration Servers
- Live Vespa upgrade procedure
- Config Sentinel
- Config Proxy
- Docker Containers
- Docker Containers GPU setup
- CPU Support
- Service Location Broker
- Change from attribute to index procedure
- Container
- Sizing examples
- Vespa Support CLI
-
Kubernetes
-
Modules
-
Reference
-
Applications and components
-
Schemas and documents
-
Reading and writing
-
Operations
- Health checks
- Log files
- Tools
-
Self-managed
-
Security
-
Release notes
Migrating a Vespa application to Vespa Cloud is straightforward, as applications on Vespa Cloud supports all the same features as your self-hosted Vespa instances, you're just gaining some new capabilities and avoid the operational work.
The high-level process is as follows:
The rest of this guide assumes you have a tenant ready for deployment:
$ export VESPA_TENANT_NAME=mytenant
Prerequisites:
-
Linux, macOS or Windows 10 Pro on x86_64 or arm64,
with Podman Desktop or
Docker Desktop installed, with an engine running.
-
Alternatively, start the Podman daemon:
$ podman machine init --memory 6000
$ podman machine start
- See Docker Containers for system limits and other settings.
-
Alternatively, start the Podman daemon:
- For CPUs older than Haswell (2013), see CPU Support.
- Memory: Minimum RAM dedicated to Docker/Podman. Memory recommendations.
-
Disk: Avoid
NO_SPACE- the vespaengine/vespa container image + headroom for data requires disk space. Read more. - Homebrew to install the Vespa CLI, or download the Vespa CLI from Github releases.
1. Verify source application package
An application package from a self-hosted system
can be deployed with minor modifications to the Vespa Cloud dev environment.
The root of an application package might look at this:
├── schemas
│   └── doc.sd
└── services.xml
There are often more files, the above is a minimum. This is the root of the application package - make this the current working directory:
$ cd /location/of/app/package
2. Validate the Vespa CLI
Make sure the Vespa CLI is installed, see pre-requisites above:
$ vespa
Usage:
  vespa [flags]
  vespa [command]
3. Vespa Cloud login
Configure the local environment and log in to Vespa Cloud:
$ vespa config set target cloud && \
  vespa config set application $VESPA_TENANT_NAME.myapp && \
  vespa auth login
4. Add Credentials to the Application package
Create and get security credentials:
$ vespa auth cert
This will add the security directory to the application package,
and add a public certificate to it:
├── schemas
│   └── doc.sd
├── security
│   └── clients.pem
└── services.xml
The command also installs a key/certificate pair in the Vespa CLI home directory, see vespa auth cert. This pair is used in subsequent accesses to the data plane for document and query operations.
5. Vespa Cloud Enclave Only: Add Account
Add deployment.xml with your cloud provider account - This ensures the deployment uses resources from the correct account - examples:
<deployment version="1.0" cloud-account="gcp:project-name">
   <dev />
</deployment>
<deployment version="1.0" cloud-account="aws:123456789012">
    <dev />
</deployment>
The application package should look like:
├── deployment.xml
├── schemas
│   └── doc.sd
├── security
│   └── clients.pem
└── services.xml
6. Remove hosts.xml
hosts.xml is not used in Vespa Cloud, remove it.
7. Modify services.xml
Edit the <nodes> configuration in services.xml - from:
<container id="default" version="1.0">
    <document-api/>
    <document-processing/>
    <search/>
    <nodes>
        <node hostalias="node4" />
        <node hostalias="node5" />
    </nodes>
</container>
to:
<container id="default" version="1.0">
    <document-api/>
    <document-processing/>
    <search/>
    <nodes count="2">
         <resources vcpu="2" memory="8Gb" disk="50Gb"/>
    </nodes>
</container>
In short, this is the Vespa Cloud syntax for resource specifications.
Example, migrating from a cluster using c7i.2xlarge instance type,
with a 200G disk - from the AWS specifications:
c7i.2xlarge 8 16 EBS-Only
Equivalent Vespa Cloud configuration:
<resources vcpu="8" memory="16Gb" disk="200Gb"/>
Repeat this for all clusters in services.xml. Notes:
- As you are now migrating to the
devenvironment, what is actually deployed is a minimized version. The configuration changes above are easily tested in this environment. - Using
count=2is best practise at this point. - Resources must match a node instance type at the cloud providers(s) deploying to, see AWS flavors, GCP flavors, and Azure flavors.
8. Deploy to Vespa Cloud Dev Environment
At this point, the local environment and the application package is ready for deployment:
$ vespa deploy --wait 600
Please note that a first-time deployment normally takes a few minutes, as resources are provisioned.
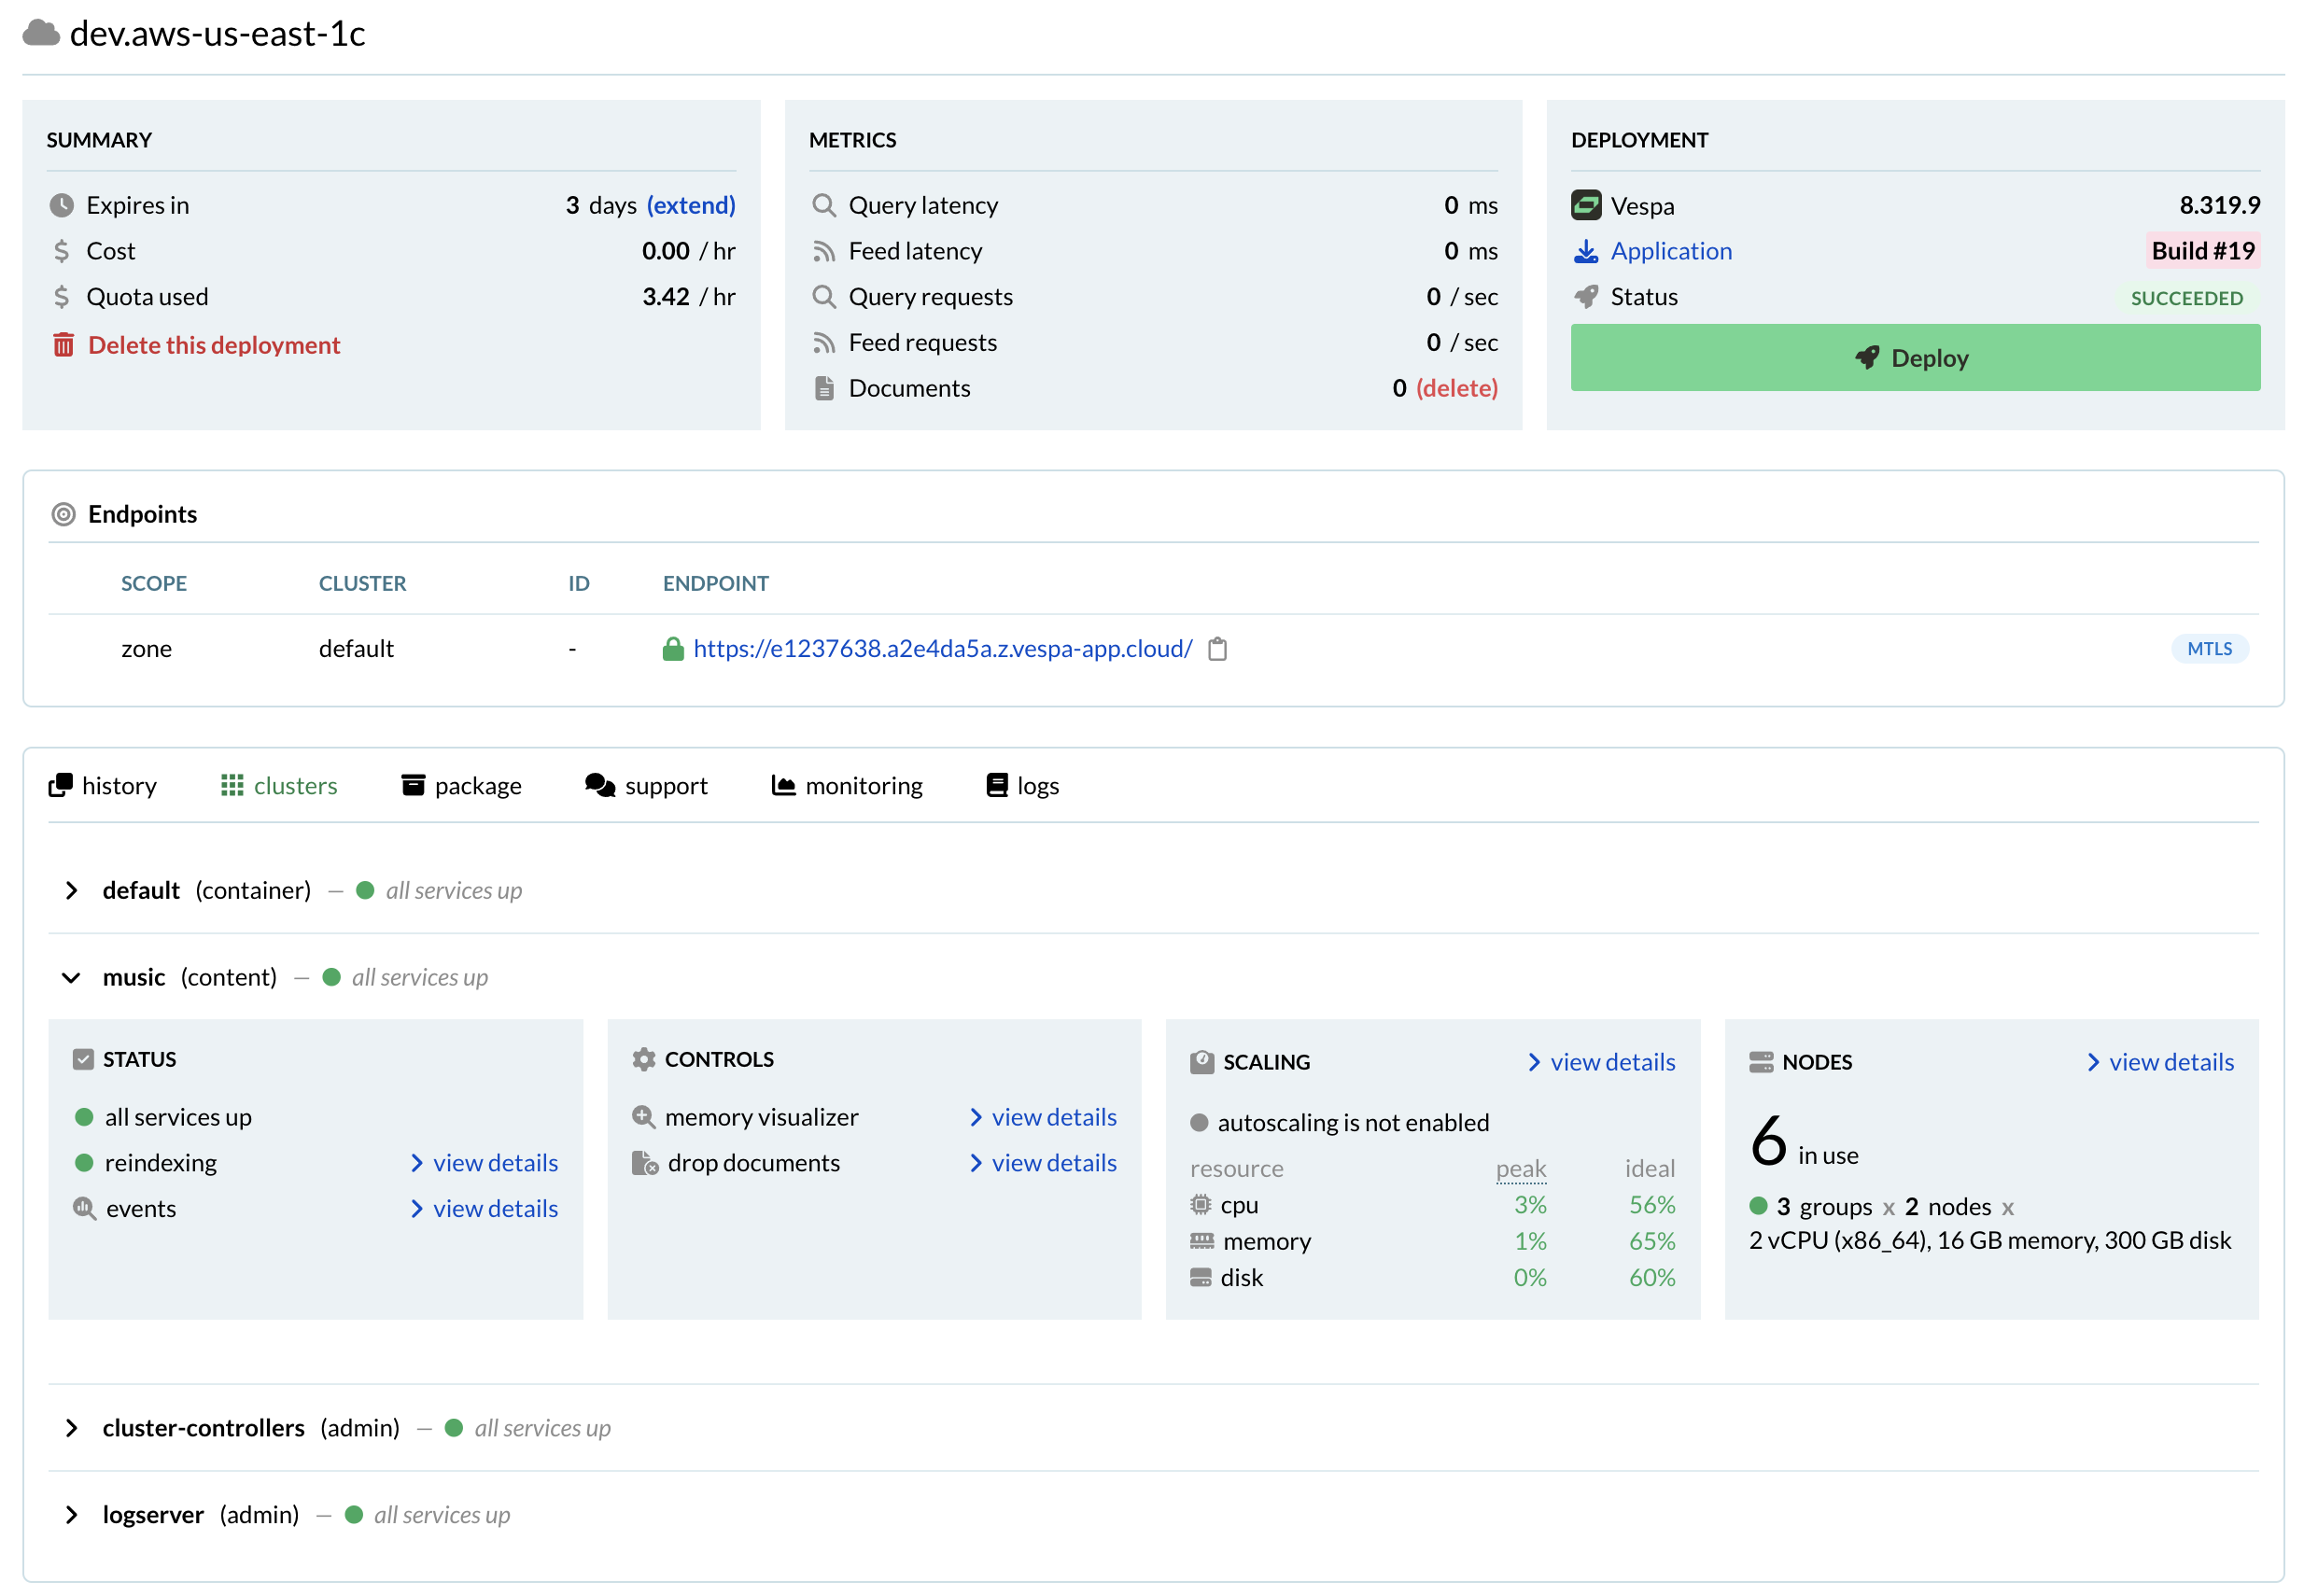
At this point, we recommend opening the console to observe the deployed application.
The link will be https://console.vespa-cloud.com/tenant/mytenant/application/myapp/dev/instance/default
(replace with your own names) - this is also easily found in the console main page:
Refer to vespa8 release notes for troubleshooting in case the deployments fails, based on a Vespa 7 (or earlier) version.
9. Use the Endpoints
The endpoints are shown in the console, one can also list them like:
$ vespa status query
Container default at https://aa1c1234.b225678e.z.vespa-app.cloud/ is ready
Test the query endpoint, expect totalCount: 0:
$ vespa query 'select * from sources * where true'
{
    "root": {
        "id": "toplevel",
        "relevance": 1.0,
        "fields": {
            "totalCount": 0
        },
In the services.xml examples at the start of this guide,
both <search> and <document> and configured in the same cluster, named default.
In case of multiple container clusters, select the one configured with <search>:
vespa query 'select * from sources * where true' --cluster myquerycluster
Finally, feed a document to the cluster (this is the cluster configured with <document>)
vespa feed mydoc.jsonl --cluster myfeedcluster
Redo the query and observe nonzero totalCount.
Next steps
This is the final step in the functional validation. Please note:
dev expire after 7 days of inactivity,
i.e., 7 days after the last deployment.
This applies to all plans.
Use the Vespa Console to extend the expiry period, or redeploy the application to add 7 more days.
- Read more about the dev environment
- Feed (a subset) of the data and validate that queries and other API accesses work as expected.
- At the end of the validation process, continue to production deployment to set up in production zones.